Wednesday, September 11, 2013

Ruffled Burlap Wreath Tutorial {Burlap & Glam}

I don't know about you, but once Fall hits I get the unexplainable urge to make about a dozen wreaths.

This year I am practicing some self-restraint and am only making two wreaths for the Fall season. The Christmas season doesn't stand a chance because I'll most likely go bonkers making wreaths. Wreaths for every door in the house!

The first wreath I'm going to share with you is my "grown up" wreath for the front door. I wanted something sophisticated, warm feeling, and a little glam, too. Glam is where the glitter comes in, BTW. Oh, and ruffles. A girl has got to have some ruffles in her life.


Your supplies:
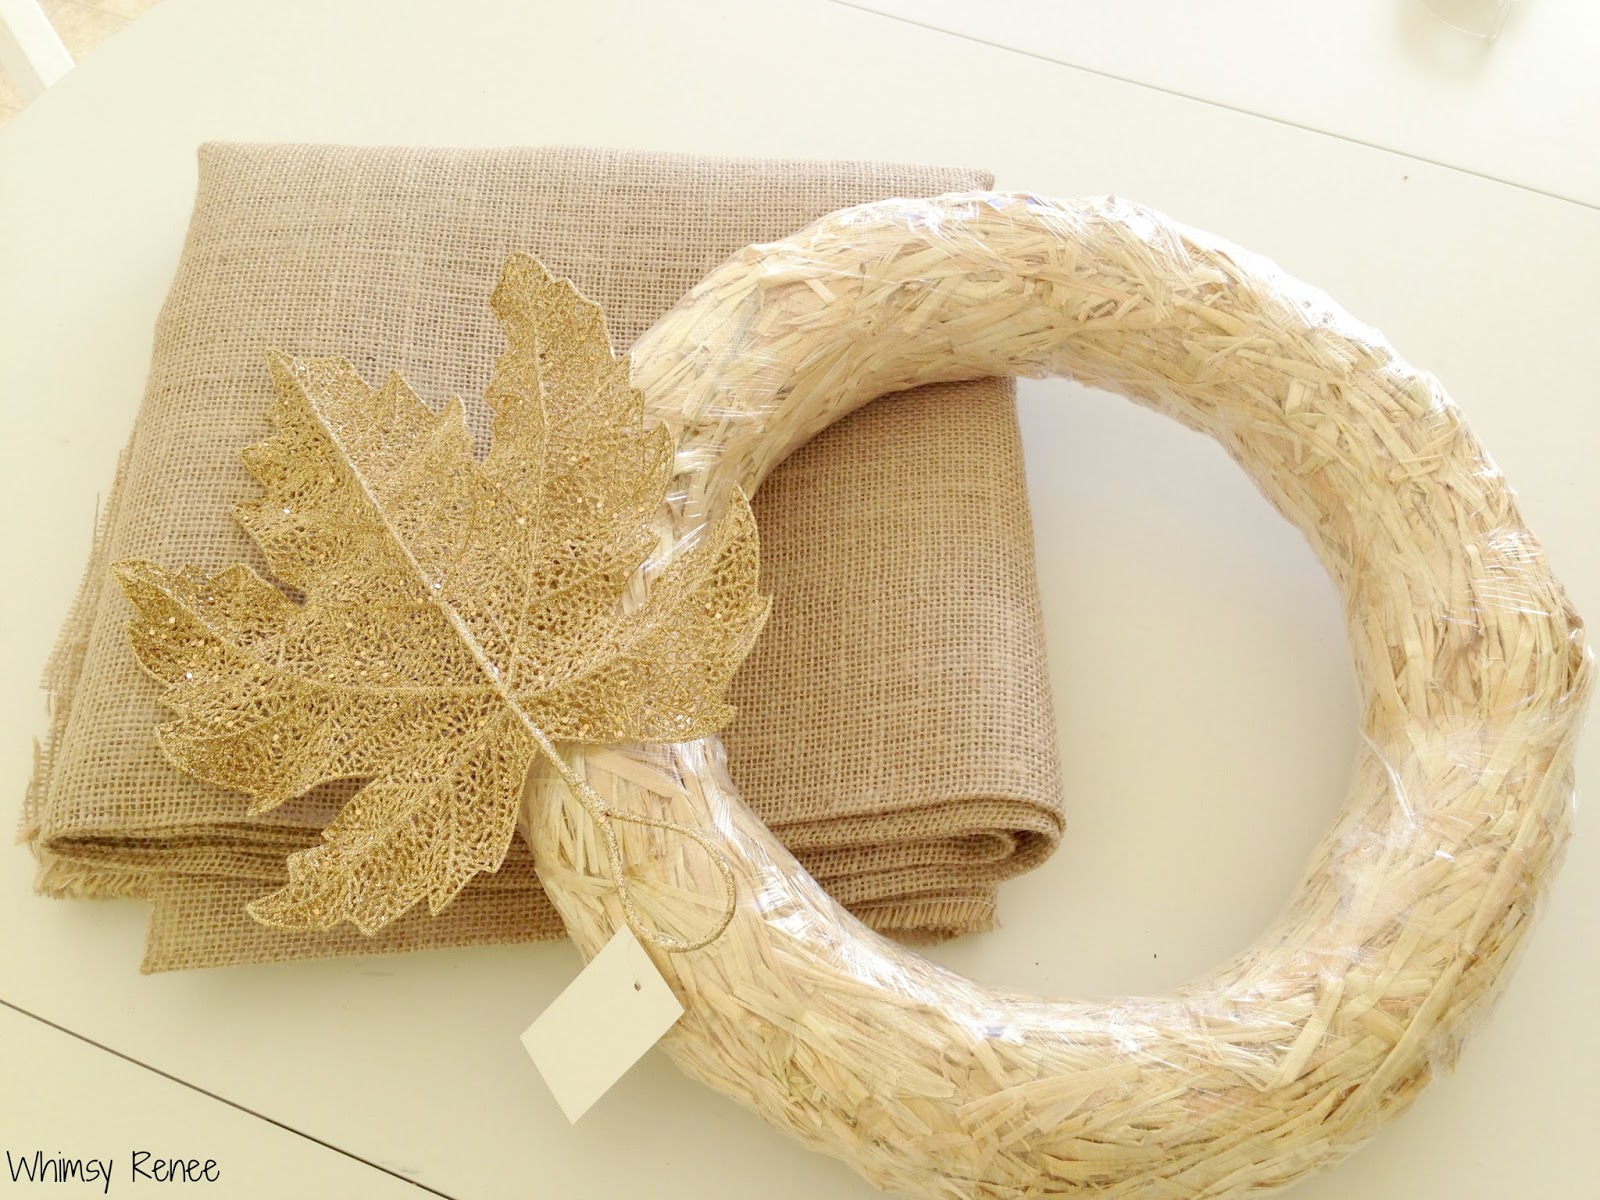


-Burlap - I got two yards from Joann and had enough for this wreath plus some left for other fun Fall craftiness, holla!
-A straw wreath form - or any wreath form, really. Just remember you'll be hot gluing burlap onto it, so nothing that is particularly melty.
-Embellishments of your choice - I got this glittery leaf at Christmas Tree Shops. In the end I knew I NEEDED more glitter (and I had to cover up a boo-boo: keep reading) so I found two more.
Not pictured:
-Needle and thread - I used normal thread, but upholstery thread would have been much stronger.
-Hot glue gun

Step 1:

Cut your burlap into strips. I cut mine about 4-5 inches wide and as long as I could get them. Start gluing and wrapping the strips around your wreath form. This will give your ruffles and embellishments something to grab onto, as well as cover up all that straw.


Step 2:
Cut out two more strips of burlap, depending on how wide you want your ruffles. I knew I wanted one wider, looser ruffle around the outside of my wreath, and another smaller, more ruffle-y ruffle in front of that. I measured around my wreath and cut a strip that measured the circumference of my wreath plus half. If I remember correctly, the strip for the wider ruffle was about 70" long and 10" wide and the strip for the smaller ruffle was a little shorter in length and about 6" wide.
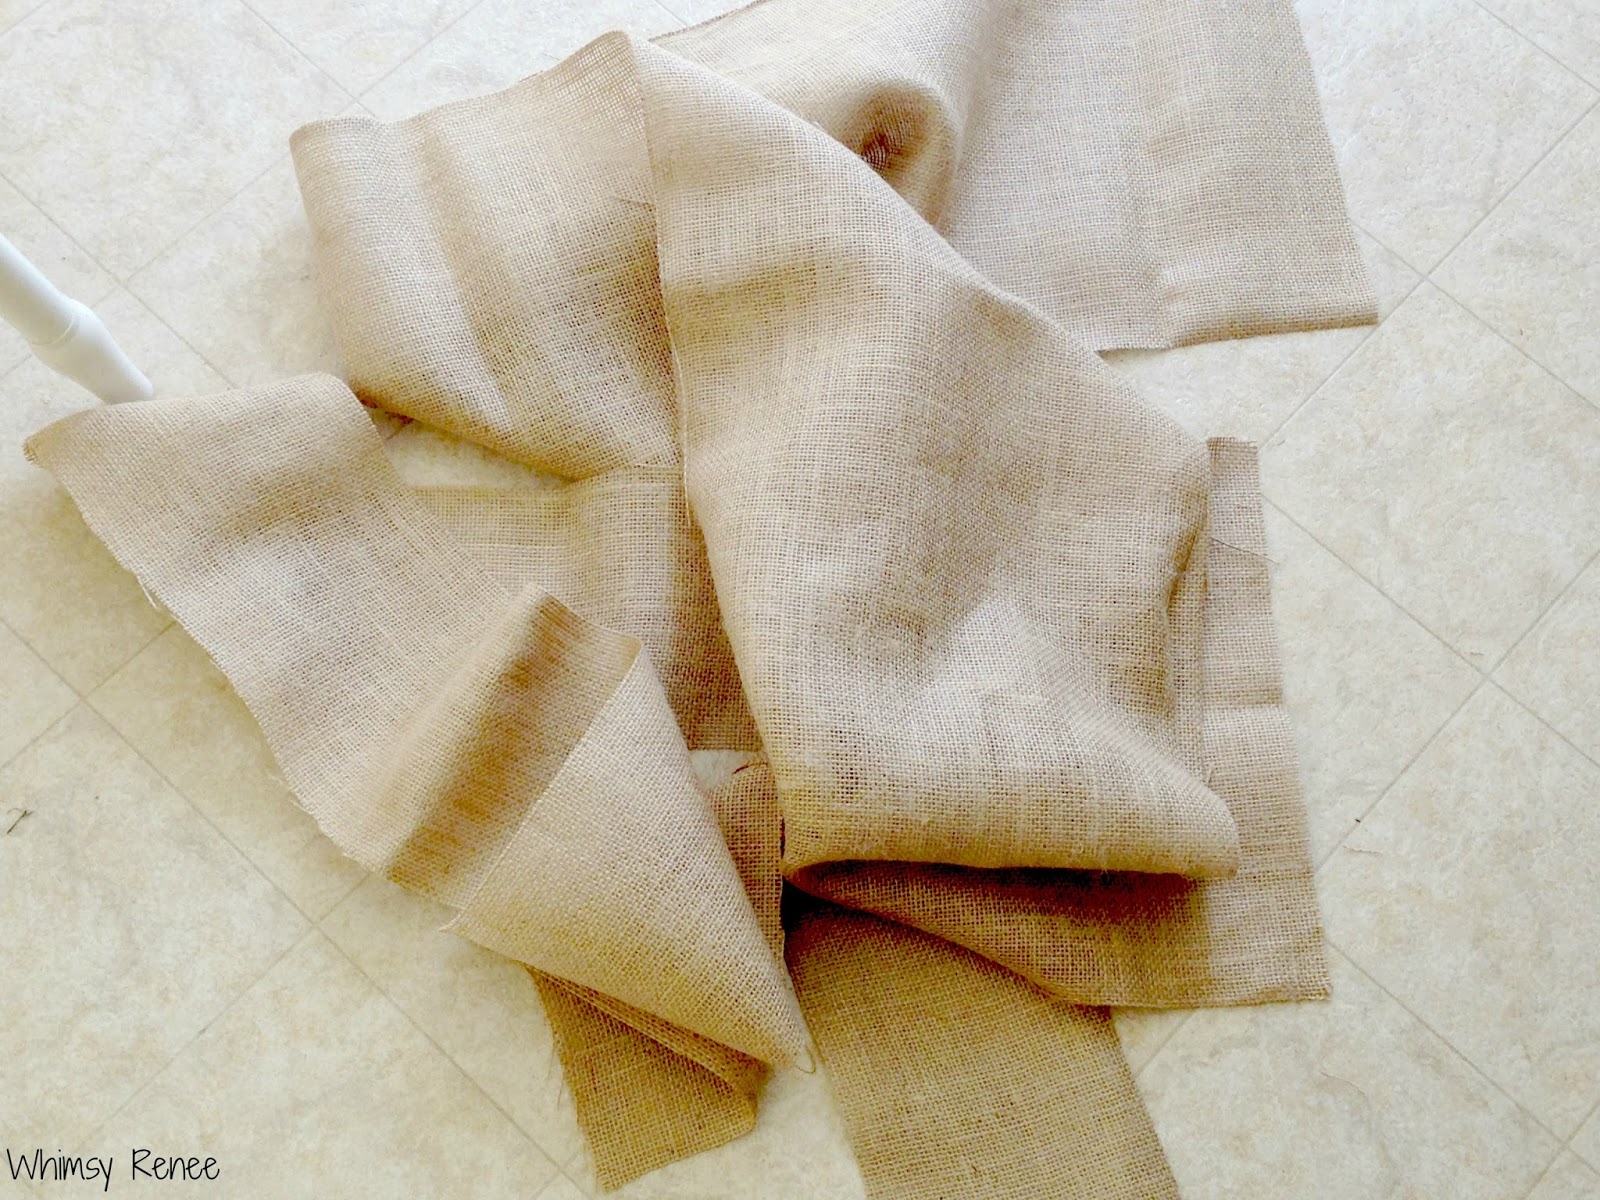
Also, I feel like now is a good a time as any to share with you that I worked mostly from my dining room floor
because burlap is MESSY. I figured if I worked close enough to the floor, burlap debris didn't have to fall far for clean up.

Note: I wanted a clean edge to the ruffled exposed edge of my burlap, so I folded my strips in half (and should have pressed them so I had a nice crease, but didn't--so lazy) and actually wound up with a 5" and a 3" ruffle. Remember to do that if you want a clean edge, or consider cutting your strips a little less wide if you are cool with the unfinished edge of the burlap on the outside edge of your wreath.

Step 3:
Burlap has a pretty loose weave, so I added a bead of hot glue where I threaded my needle through the fabric at first to hold it in place.

Let this be known that I haven't given myself a manicure in like two weeks.
Which is a record for me.

Run a straight stitch down the length of your burlap, then gather your fabric into a snazzy ruffle. Remember, I wanted this ruffle to be a little more "wavy" than "ruffley", so I didn't gather too much. Once I decided I liked how my burlap was gathered, I added another bead of hot glue to the end of my thread to hold it in place and maintain the wavy ruffle.

Step 4:
Decide which part of your wreath form you want to be the front and back, and then flip it over so it's front-side-down. Glue your ruffle to the back of your wreath.

Here the wreath is face up. Post-gluing down my ruffle.


Step 4(a):
Apparently I am miserable at measuring. Shrug your shoulders because you know you'll come up with something in the meantime that'll keep your wreath from looking like it should be a burlap turkey (is it just me, or does anyone see the makings of a sweet turkey wreath?). It's not Thanksgiving yet, friends.

Step 5:
Repeat Step Four with your second strip of burlap that will be rufflier than your first. Gather that fabric and secure your thread.

Step 6:
Tuck your ruffley ruffle between your wreath form and your first ruffle and secure to both the wreath form and the first ruffle with your hot glue gun.


Note: Technically, I suppose you could glue your first smaller ruffley ruffle to the wreath form followed by your wider, less ruffley ruffle and not have to worry about tucking it in anywhere. The things you learn as you go.

Step 6(a):
Crap. This ruffle is too short, too. Brainstorm about a clever fix while you work.

Step 7:
Add the embellishments of your choice.
Even though you originally thought one glittered leaf would be enough embellishment for your simple fall wreath, decide that two more would be even more glitterific and fabulous and will cover up your inadequacies in measuring at the bottom of your wreath. Now it will not be looking like a burlap turkey.

Glue those suckers on. Hello, glam!

Decide that you just don't know when to quit and make a bow out of your burlap scraps. Glue it onto the top of your wreath.


Step Nine:
Hang your wreath on your sassy red door (or, you know, whatever color your front door is) and admire your hard work.


And there you have it! A rustic AND glittery glam Fall wreath that did not, in fact, wind up looking like a turkey. Thanks for bearing with me through the tutorial! I have a second more whimsical and fun wreath underway that is SO MUCH easier. Can't wait to share that one with you soon!

Who else out there is a wreath-making-maniac? I know I can't be the only one!

Linking up with:
The Turquoise HomeElla ClaireThe Brambleberry Cottage52 MantelsThe Shabby Creek CottageEmbracing ChangeLive Laugh RoweThe Girl CreativeGlued to My CraftsImparting GraceFrench Country CottageBlissful and DomesticJennifer RizzoMy Romantic HomeFinding FabulousThe Shabby NestHouse of RoseObsessive and CreativeWhipperberryThe Happy HousieDIY Show OffCraft-O-ManiacDimples and Pig TalesHome ComingCupcakes & CrinolineThe Winthrop ChroniclesNot Just a HousewifeThe Farmhouse PorchA Stroll Thru LifeHome Stories A to ZMy Uncommon Slice of SuburbiaCozy Little HouseThe Well Crafted HomeSavvy Southern StyleElla ClaireDIY By DesignThe DIY DreamerSNAP!The Blissful Bee

Also linking up with:
Autumn Abounds Link Party


Monday, September 9, 2013

{The Liebster Award} or The One Where I Go All Sally Field at the Oscars

This is kind of how I feel right now:

source

Rhonda over at Obsessive and Creative left me a comment over the weekend to let me know she nominated me for the Liebster Award. I've seen this award floating around blogland; it's an award passed  from blogger to blogger to recognize newer blogs to encourage them to keep up the good work.


"Liebster" is German for sweetest, kindest, nicest, dearest, beloved, lovely, kind, pleasant, valued, cute, endearing, and welcome. So yay!  

Thanks again to Rhonda for the nomination, and please be sure to check out her blog: Obsessive and Creative.

And now for the rules:


1. You must link back to the person who nominated you.


2. You must answer the 11 questions given to you by your nominator.


3. You must pick 11 bloggers, each with under 200 subscribers, to be nominated for the award.


4. You must come up with 11 questions for your nominees to answer.


5. You must go their blogs and notify them of their nomination.

And that's it! I'm looking forward to sharing the blog love with some other wonderful writers that I've subscribed to and enjoy reading.

My questions from Rhonda:

1. What is your favorite crafting tool?
My hot glue gun, no doubt. I have three of them.

2. Why do you blog?
I blog to keep myself accountable in undertaking projects around the house. I'm pretty well known for starting something, getting distracted by another project, and then leaving the former project neglected and sad for a few weeks. Blogging helps keep the projects rolling since there are other people besides my mom  reading and I'm sure they want to know how a particular project turned out. Also, I think this blog is a cool way to chronicle all the befores and afters of our first home.

3. Where is your fantasy vacation destination?
Disney World. Seriously. Or Hawaii.

4. What is your favorite piece of clothing this month?
My cardigans. It's been chilly in the mornings and it's always freezing in my office, so I wear a cardigan every weekday. So cozy. Looking forward to busting out the scarves later this month!

5. Who helped shape you into the creative individual you are?
Believe it or not, my daughter. Who is all of two years old. It started because I wanted to make her cute things. So I started with bows and hair accessories (which is hilarious because she had no hair for the first year of her life). And then I taught myself to crochet to make her some hats. And then I realized I could make pretty things for around the house. And here I am!

6. What is your favorite movie of all time?
Breakfast at Tiffany's. When I have a sick, lounge on the couch all day type of day, that movie is always on the roster.

7. Finish this statement: When I cook I ....
Either destroy it/burn it beyond recognition or make the most delectable dish ever known to mankind. There is no happy medium in my kitchen.

8. Who is your hero?
My husband. He works so hard for everything he has. 

9. What blog inspired you to blog, or inspires you now as a blogger?
Young House Love was the "it" blog for me, as I'm sure it is with a lot of bloggers. Sherry & John are so relatable and really made me think, 'Hey, we can do that too.'

10. What super power would you like to have?
The ability to turn back time, so I could have more hours in the day. Working 10 hours a day, wrangling the two year old, writing a blog, and taking on projects is so much fun, but exhausting.

11. What is your favorite color?
Green. But lately I've been leaning more into blues.

Without further ado, here are the blogs I'd like to nominate for the Liebster Award; thanks for being awesome and making my morning reading a bit more enjoyable:
I've started with five blogs I genuinely enjoy reading and subscribe to in some way or another. I think I read somewhere in the original rules from the Liebster Award that you only had to nominate five blogs. I may take some artistic liberty here and go with just five :)

I used either GFC stats if they were visible on your blog or Bloglovin stats. I didn't include social media followers.  If you actually do have more than 200 followers (on either stat platform individually or combined between the two), or have already been nominated, my bad!

Here are your questions, ladies:
1. Why did you start blogging?
2. What is your favorite book?
3. What movie makes you laugh out loud?
4. Who or what inspires you? This can be blog-related or not.
5. Who would play you in a movie?
6. How long have you been blogging?
7. What time of the day do you write?
8. What is the most annoying song in the universe?
9. What part of your home is your favorite?
10. What is your favorite recipe?
11. What is your favorite season?

Hope everyone has a happy Tuesday!


Powder Room Makeover & Reveal

It's time, friends!

I am missing only three small pieces to the final product, but I'm so excited to share it with you I'm going to let the unfinished-ness (unfinished in my mind, anyway) slide.

How about a before and after to kick things off?


I know, I know...this is only a shot of one wall of the whole room. But it is a 3' x 7' teeny tiny thing and with the addition of the new light fixture and mirror, I feel like this gives you the best idea of the change.

Want to see how we got here?  Check out my Powder Room Mood Board.

When we started, this room was so purple and so dark. As it is a very, very small and narrow room, I felt that the purple was too enclosing and wanted desperately to lighten things up. The fixtures were all builders grade boringness and I wanted something a little more custom-looking. Our budget for this room was as tiny as the room was, so I had to leave behind my dreams of warm wood-look tile and work with the existing bones of the room, vinyl flooring and all, with some inexpensive updates thrown in.

Some more photos:


This is a view from our foyer, since the powder room lies right behind our front door.


Since I had to give up my dreams of these tiles for budget and logistical reasons, I found this sweet rug to hide the ugly vinyl keep our tootsies warm at Joann Fabrics for 50% off. It's super soft, and while it was with their Fall seasonal merchandise and you can definitely see the leaf motif going on here, I think it'll work perfectly year-round. And did I mention that it's SO SOFT? Because it is. I might have rubbed it on my face in the store when I first found it.

Get ready for a few awkward pics of me in the mirror taking photos with my iPhone.
The light fixture is this one from Home Depot. I'm proud to say I installed this light fixture all by myself, which I'm sure to some doesn't sound too exciting but it totally was to me. Of course, I did totally destroy the old light fixture during the switch thanks to dropping it into the sink, shattering the bulbs and denting the front plate of it, but it was so ugly I got over that pretty quickly. For only costing me $24 (plus another $5 or so for the clear bulbs), this light fixture makes all the difference and is so bright and happy.

We also ditched the 24" towel bar that was previously in the powder room and switched it out for the towel ring.

And now, a completely related but unrelated rant on the number of towel bars in my home:
There was one 24" towel bar in my powder room. Why a powder room needs a towel bar that long is completely beyond me, but Peyton's bathroom has a towel bar AND hooks on the back of the door, our master bathroom has TWO 24" towel bars (in different finishes! ARGHH!) and hooks on the back of the door, AND towel bars tiled into each shower. Why?!? Guys, if you count the towel bar I took out of the powder room, that's SIX towel bars. Sheesh.

Anyway.

We kept the light fixture, the towel ring, and the toilet paper holder all chrome to reflect some more light around the room and to match the sink faucet, which we didn't change out. I don't know about you, but while I do like the look of oil rubbed bronze, I am seeing it everywhere and for this small space, I felt that finish just wouldn't cut it. Plus I'm thinking I am totally over the oil rubbed bronze trend. I'm finding that the chrome fixtures are keeping things looking light and airy, and we're loving it.


The mirror was a local antique find for $22. The paint is worn and chippy and we left it that way. The inside rim of the mirror is painted gold, so I'm looking forward to scouting out a few gold accessories to tie everything together.


And, of course, here are the shelves you can read all about here. Now they've been touched up with a few Fall accents thanks to the faux tiny apples in the thrift store jar and the dollar store gourds on my thrift store candle sticks. Everything you see on these shelves was either thrifted or handmade (or bought in bulk at Sam's--I'm looking at you, toilet paper).

The walls are painted Morning Fog by Olympic. While I love the color, I'm not so thrilled with the quality of the paint itself. I think in the future I'm more likely to stick with my Behr paint. I'm a sucker for all things Behr anymore.

I'm still on the hunt for a soap dispenser, a proper hand towel (currently using a brown wash cloth since it ties in with the walnut-stained shelves), and a wastebasket. I've got my eye on the few items I included in my mood board, but am also keeping them open for any new possibilities.

So there you have it...the first room in our house we can officially say is "finished"! Sure, it might be the tiniest of all our rooms, but since it's one our guests will see pretty frequently, I'm liking the fact that we took care of all that purple paint.

Have you overhauled any rooms in your home lately--small or large? Feel free to let me know in the comments!

Linking up with:
Kitchen Table ArtCoastal CharmSo Much Better With AgeRain on a Tin RoofDimples and Pig TalesCommon-a My HouseMaison de PaxDIY Show OffCraft-O-ManiacHuckleberry LoveKeeping It SimpleAlderberry HillCozy Little HouseHome ComingHome Stories A to ZMy Uncommon Slice of SuburbiaA Stroll Thru LifeThe Farmhouse PorchThe Winthrop ChroniclesCupcakes and CrinolineThe Well Crafted HomeNot Just a HousewifeThe DIY DreamerSavvy Southern StyleDIY by DesignThe Everyday HomeThe Turquoise HomeElla ClaireThe Brambleberry Cottage52 MantelsLamberts LatelyThe Shabby Creek CottageEmbracing ChangeThe Girl CreativeGlued to My CraftsImparting GraceFrench Country CottageBlissful and DomesticJennifer RizzoMy Romantic HomeFinding FabulousThe Shabby NestHouse of RoseWhipperberry


Friday, September 6, 2013

Friday Faves

Happy Friday, ya'll!

I had so much fun sharing some Fall Decor Inspiration with you last Friday that I decided to make a regular thing of it!

My apologies in advance for the filler posts this week. Between the look back at August and now Friday Faves, I feel like such a slacker for not shelling out any actual new personal content. I promise though, I have a few projects lined up for the weekend that will provide lots of new content to share with you!

And now for a look at some of my favorite pins from Pinterest-land this week (a friendly reminder: please remember to pin from the original sources, which I've included under each image!):


 source: Live Love DIY


source: Half Baked Harvest 
(had to throw some food in...these look SO GOOD.)

source: Country Living


 PS: Is Pinterest a major time-suck for anyone else? I swear, it was so hard to choose just five favorites and I got lost for over an hour browsing around. Where does time go when you're on Pinterest?

To see these pins and a lot more check out my Pinterest boards. Feel free to follow me and I'll return in favor.

Hope everyone has a great weekend! The weather here is getting cooler already...the high was only 73 degrees today and I was actually cold this morning before I left for work. It's like September happened and Mother Nature knows we're all excited for Fall.

What's up your sleeves this weekend?


Wednesday, September 4, 2013

A Look Back at August

I can't believe August has come and gone and here I am, staring at September 4th! The days are still warm, but this morning was definitely a little cooler than normal.

Even though the official end of Summer is still a couple of weeks away, I find myself already gravitating toward my hoard of pumpkin spice k-cups, pumpkin-scented candles, and other Fall goodies. It's just something about September that gets me every year :)

While I am so stoked to start jumping ahead and celebrating all things Autumn, I wanted to take a look back at the last month to highlight my three most popular posts of the month. While I was checking out the stats one (or two) things seemed certain: it was all about the Powder Room (now affectionately renamed the W.C.) and that darned red front door.

#3 in the countdown is How to Paint a Front Door Red & Save Your Sanity, Part One, in which I lament over the "shoulda-couldas" that would have made painting my front door red from black SO much easier. I also included some sweeeeeet red door eye candy from around the blogosphere.


If you want to check out Part Two, feel free to click over here.

#2 and #1 are two of the more recent projects I've shared with you, Powder Room Progress and How to Fake a Reclaimed Wood Sign, respectively. These two posts are both involved with my Powder Room Makeover (check out the mood board here).


I've got a reveal and wrap-up coming up (as soon as we install some hardware!) that I can't wait to share with you!

I'd just like to thank everyone for stopping by my little neck of the internet woods. So glad you're here!

Coming up this month: some Fall decor, the W.C. reveal, some wreath tutorials, and making a yard a little more presentable. That plus a little more to share! I can't wait to gear up for the Fall and holiday seasons with you guys!