


Our front door is black. It goes with our black shutters. It is boring. And, since our house faces west, the afternoon sun beats down on our front door and that door gets HOT.
Like, I've actually burned the palm of my hand on said door.
Like, I'm surprised it has not spontaneously combusted by now kind of hot (which, I guess, would make it not spontaneous).
 |
| Nice to see you again, MLS photo. |
Like, I've actually burned the palm of my hand on said door.
Like, I'm surprised it has not spontaneously combusted by now kind of hot (which, I guess, would make it not spontaneous).
So, when the idea of painting the front door started floating around, I immediately knew I wanted a red door.
You might also remember that painting the front door was item numero uno on the list of summer projects I wanted to take on this summer. I will be the first person to admit I'm not nearly close to finishing that list because, um, hello? This summer has been glorious. Beach every weekend, BBQ with family and friends every Saturday, lazing around by a pool on Sundays--who has the time to tackle any projects when there's so much fun to be had?
We taped 4 different swatches of red to our front door and then immediately forgot about them and went to the beach instead. Then I remembered them and tried to remember to check them out in the morning, late morning, early afternoon, late afternoon, evening, and night. And then I forgot about them again and left them there until the heat made them curl into little paint swatch tubes and our neighbors thought we were crazy.
And then I remembered them again and promptly said:
"This one is too brown."
"This one is too purple."
"This one is too pink."
Boom.
And then settled on Glidden's Candy Apple. In my head, it is the perfect red that maintains it's redness throughout the day instead of faintly changing with the sun's position.

We had a bout of yucky, rainy weather on Saturday, so I woke up that morning with a pep in my step to get something, anything DIY-related taken care of.
Off to Home Depot we went, and we spent about an hour or so roaming around, planning potential projects to tackle in the next few months, and I picked up some supplies: a quart of Kilz Complete Primer, and a quart of Glidden Premium Collection Exterior House Paint in Candy Apple in a semi-gloss finish.
All of the other materials I had at home, so this project was going to cost me a whopping $20.

Supplies:
- Exterior-friendly primer of your choice
- Exterior-friendly paint of your choice
- Paint tray
- Foam roller
- Foam brushes (later swapped out by my 2.5" angled Purdy brush, LIFESAVER.)
- Painter's Tape
- Wood putty (to fill any holes or gaps)
- Sanding pads or a sanding block
- If you're also changing out your hardware, gather up your new hardware or cheat and spray paint your existing stuff. I used Rustoleum Universal All Surface Forged Hammered Spray Paint and Primer In One in Burnished Amber.
You'll see that there is a can of Coke in the supply line-up. This is necessary. By the second day of door painting, you may want to replace it with a glass of wine. Or two glasses of wine. Either way.
"Second day?" You might be asking yourself, "But Brittany, surely you can knock this out in one day."
And surely you can, dear friends. That is why I am here to tell you my tale.
Tips to Save Your Sanity:
- Oh, you're painting a black door red? Get gray-tinted primer. Covering black paint with white primer is a headache, but wait until you try to paint even coats of red paint over white primer. (Head = exploded.)
- Electric sander in the house while two year old is napping is not a good idea.
- Wrap your sanding disc around a sponge and BAM--sanding sponge/block/apparatus. Much better than suffering the wrath of cranky toddler.
- For the love of all things good and nice in this world, use the right brushes and rollers. I THOUGHT I wanted foam brushes and rollers to minimize the look of brushstrokes, but brushstrokes would have been a welcome sight after the foam brushes soaked up too much paint and left MOUNDS of paint in the insets around my doors. At first I cried, then I wised up and grabbed the brush and smoothed everything out. I still used the roller for all of the raised parts, but the brush is the way to go for your insets.
And now, for some photographs:
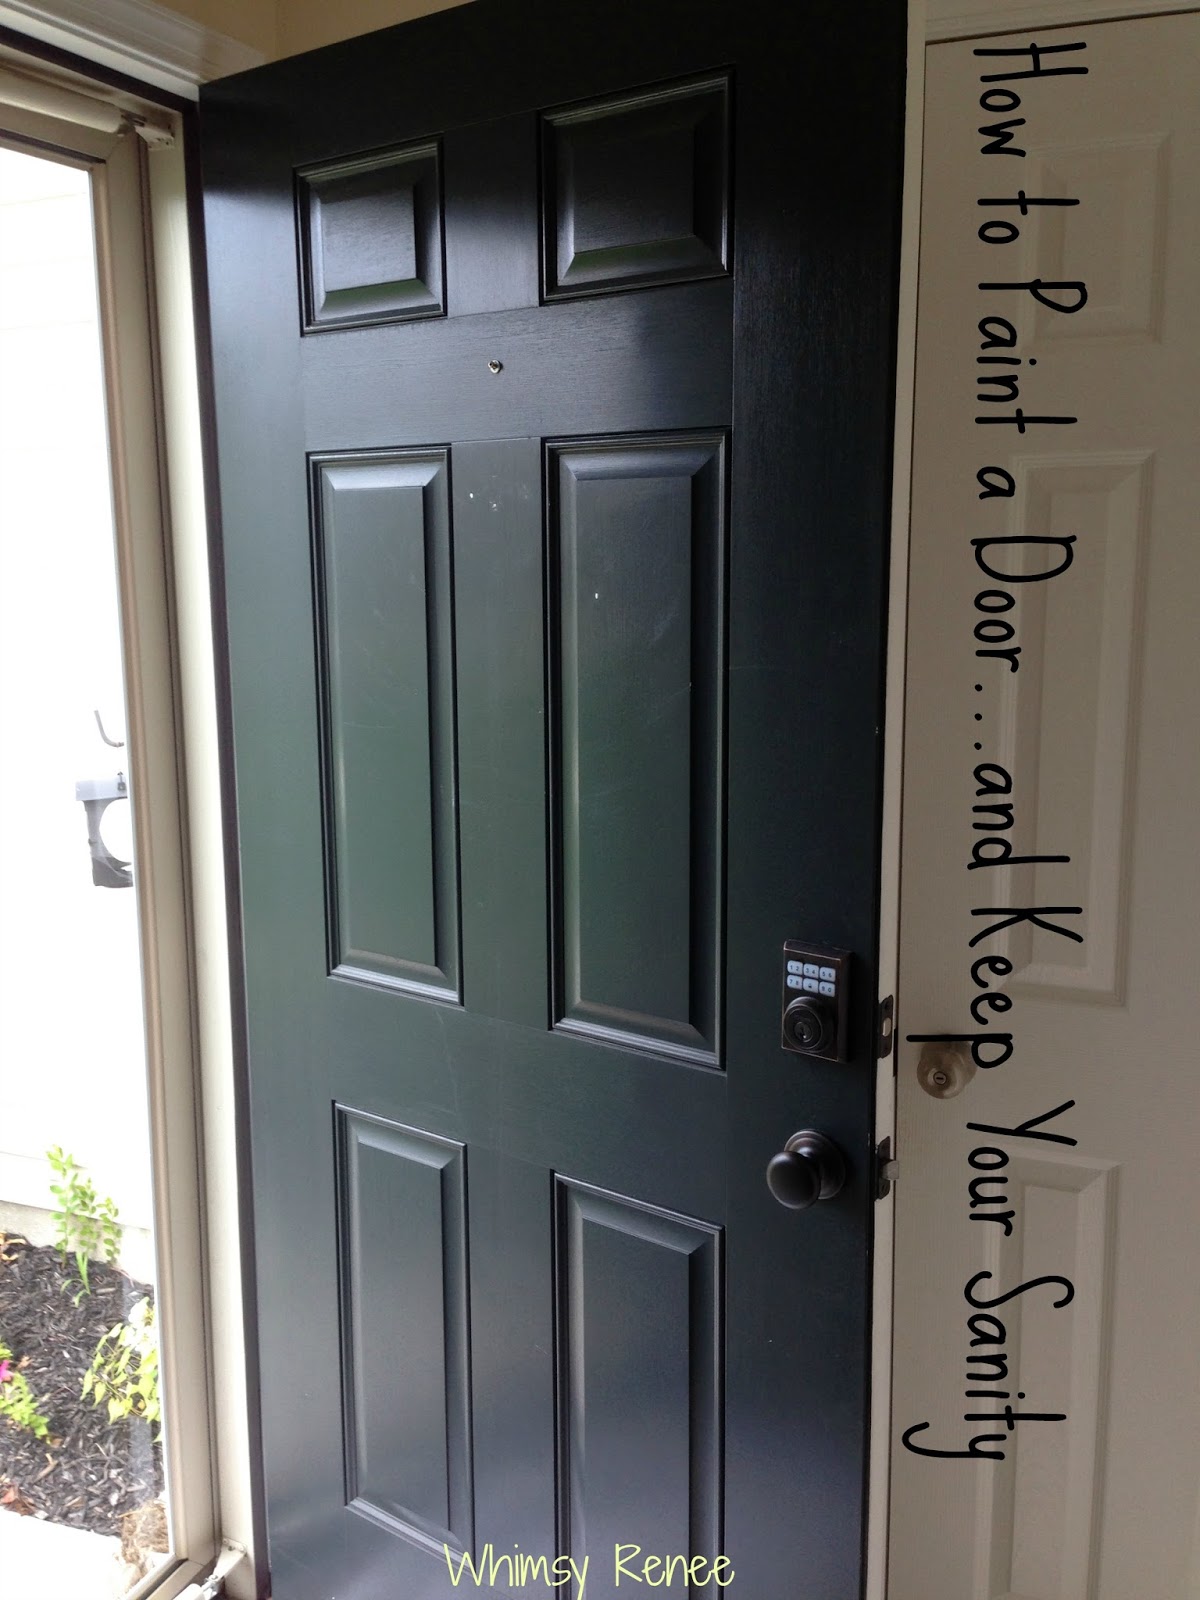
Black door, brush-painted Oil Rubbed Bronze doorknob (It looks like it was a brushed nickel doorknob before and I definitely saw brushstrokes. Dislike.) . Keypad bolt lock installed by us (that's right, you don't get into our house without the magic passssssssword!). Brushstrokes all up in the door paint, cringe.
I removed the doorknob from the door (remembering carefully how I took it apart so I could get it back together again), and stuck both sides and the screws into a cardboard box that I had pre-punched holes in for ease of spray painting. And then I spray painted. Three light coats. I didn't remove our bolt locking mechanism from the door because I was afraid to take it apart and that it wouldn't work anymore. So I taped around it. It's a pretty close match to the doorknob, anyway.
 |
| Also, shortly after I sprayed on my first coat, the wind took my box and promptly put my hardware into the dirt. And then it rained. Sign #64981647 that this was not my day. |
Back to the door. I tried the electric sander to rough up the surface, but the tiny sleeping diva upstairs didn't appreciate it. So I made my own sanding block:

I should also note that the previous owners decided to put a screw and a washer in the door as a wreath hanger. Pardon me while I silently contain my rage.
 |
| I can't figure out what purpose the washer actually served. My mind is boggled by this. |
 |
| Patched with some wood putty. Sanded it down after the recommended drying time. |
Three coats of primer later (and ALL DAY), I was at my wits end. Black was still bleeding through, the last coat I was willing to paint on for the day wasn't drying nearly fast enough to be able to actually shut the door, and it was too late to take it off the hinges and replace with a piece of ply wood for the night since we had company on the way (and, not to mention, no ply wood). I was about to rip that door off its hinges and start a bonfire in my front yard.
Here is my biggest tip to save your sanity so far:
 |
| After two coats of primer, some tears, and maniacal pulling out of my hair. |
- When things aren't going your way, walk away. Take a break. Breathe. It is okay.
Luckily, our company stayed later into the night and gave my primed door the chance to dry enough so I could add my doorknob back and properly shut and lock the door at night. My uncle who is like, my painting hero, inspected my work and said as long as I sanded it down really well the next morning and took my time with the red, all would be well. That was a relief, and also why I was up at 7 AM the next day, clutching my paint brush like a woman on a mission.
 |
| Game. On. |
Part two is coming up next, friends! Part one is already exhausting and I've lived through it once.
Psssst Check out part two here: How to Paint a Front Door Red and Save Your Sanity, Part Deux
Linking up with:
Confessions of a Plate Addict, City Farmhouse, Clean and Scentsible, Yellow Bliss Road, Ella Claire Inspired, The Blissful Bee, Southern Lovely, French Country Cottage, Blissful and Domestic
Great progress....
ReplyDeleteHope yours is more successful than my last attempt... it required stripping a second time, a heavy duty (read very expensive) primer, and 2 coats of green paint.... And it has still bubbled. Time for a new door. I've been living with it since then. And yes my door faces west, with the wonder of the afternoon sun.
Hi Leah! After a nerve-wracking first day it seems to be going a little better. I only have two coats of red on the door since I have to find time between work to get a coat on and allow for ample drying time, but it's still definitely a work in progress.
DeleteAlthough, I was terrified I'd have the strip the door and start all over and my husband briefly stomped around the house grumbling about having to buy a new door ;) I feel your pain! Thanks for stopping by!