
This year I am practicing some self-restraint and am only making two wreaths for the Fall season. The Christmas season doesn't stand a chance because I'll most likely go bonkers making wreaths. Wreaths for every door in the house!
The first wreath I'm going to share with you is my "grown up" wreath for the front door. I wanted something sophisticated, warm feeling, and a little glam, too. Glam is where the glitter comes in, BTW. Oh, and ruffles. A girl has got to have some ruffles in her life.

Your supplies:
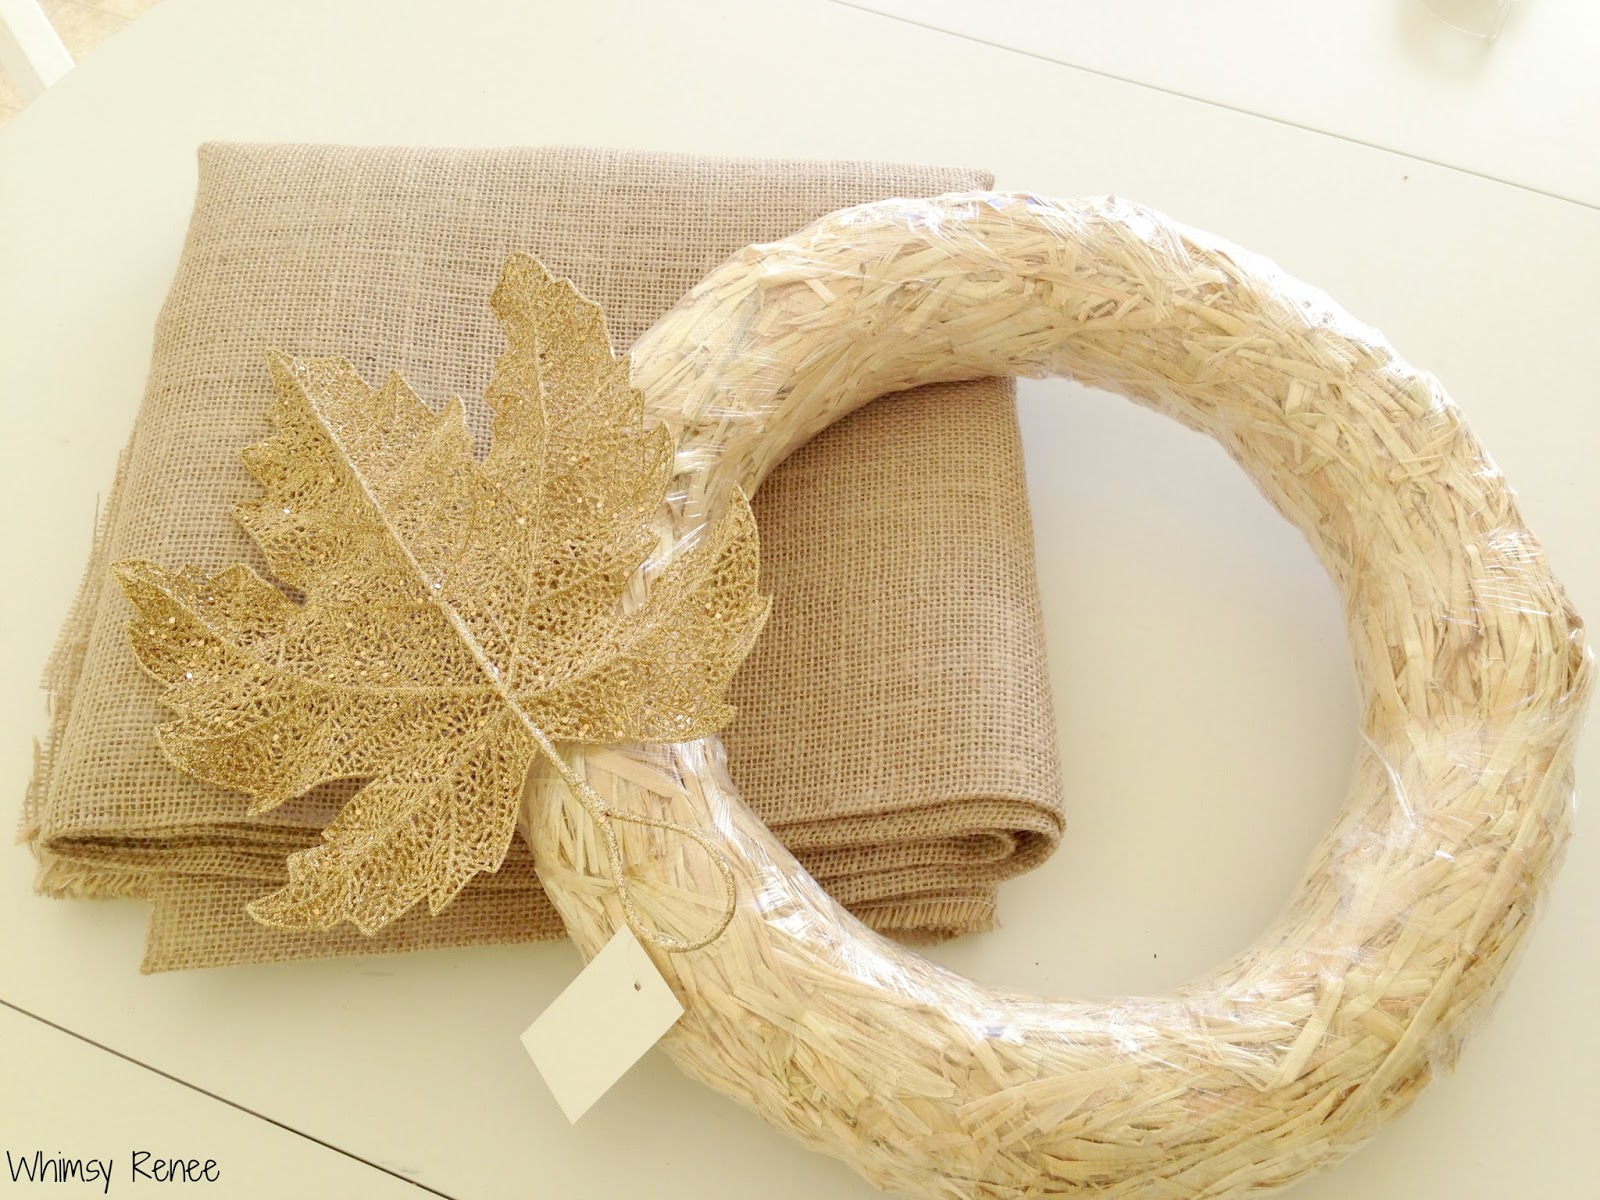
-Burlap - I got two yards from Joann and had enough for this wreath plus some left for other fun Fall craftiness, holla!
-A straw wreath form - or any wreath form, really. Just remember you'll be hot gluing burlap onto it, so nothing that is particularly melty.
-Embellishments of your choice - I got this glittery leaf at Christmas Tree Shops. In the end I knew I NEEDED more glitter (and I had to cover up a boo-boo: keep reading) so I found two more.
Not pictured:
-Needle and thread - I used normal thread, but upholstery thread would have been much stronger.
-Hot glue gun
Step 1:
Cut your burlap into strips. I cut mine about 4-5 inches wide and as long as I could get them. Start gluing and wrapping the strips around your wreath form. This will give your ruffles and embellishments something to grab onto, as well as cover up all that straw.

Step 2:
Cut out two more strips of burlap, depending on how wide you want your ruffles. I knew I wanted one wider, looser ruffle around the outside of my wreath, and another smaller, more ruffle-y ruffle in front of that. I measured around my wreath and cut a strip that measured the circumference of my wreath plus half. If I remember correctly, the strip for the wider ruffle was about 70" long and 10" wide and the strip for the smaller ruffle was a little shorter in length and about 6" wide.
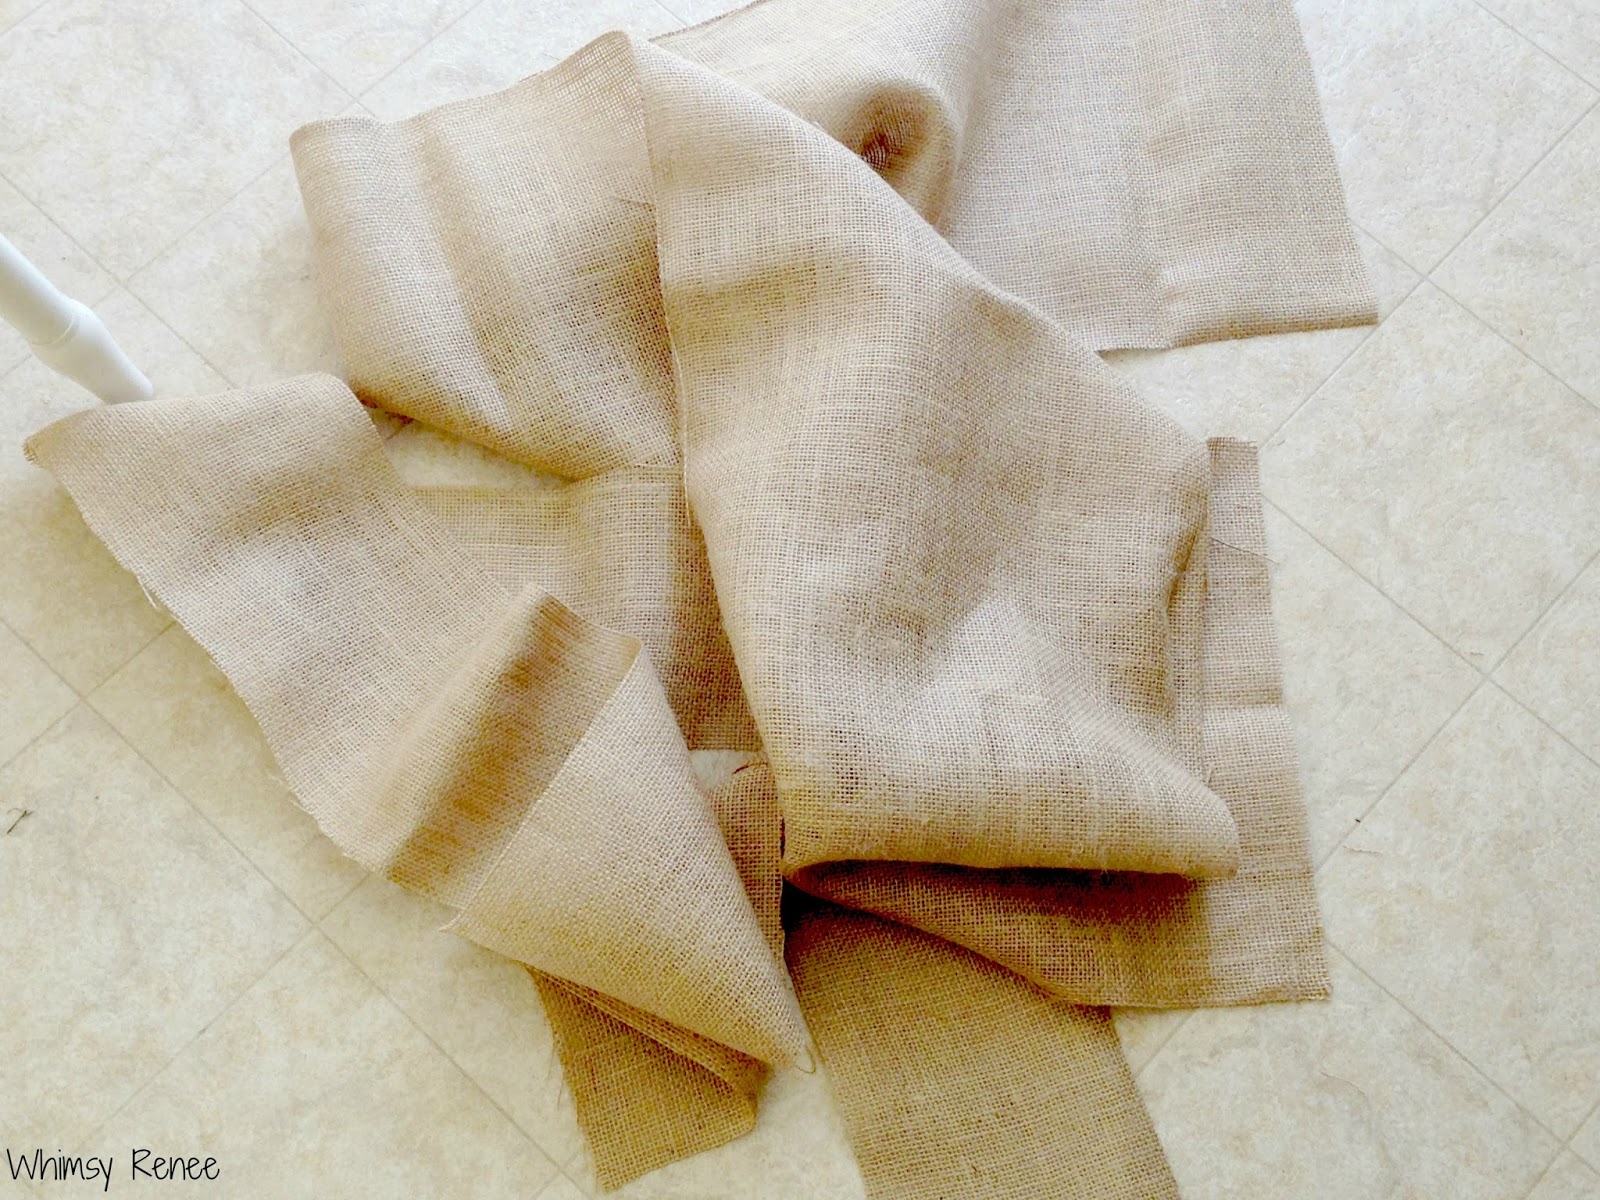 |
| Also, I feel like now is a good a time as any to share with you that I worked mostly from my dining room floor because burlap is MESSY. I figured if I worked close enough to the floor, burlap debris didn't have to fall far for clean up. |
Note: I wanted a clean edge to the ruffled exposed edge of my burlap, so I folded my strips in half (and should have pressed them so I had a nice crease, but didn't--so lazy) and actually wound up with a 5" and a 3" ruffle. Remember to do that if you want a clean edge, or consider cutting your strips a little less wide if you are cool with the unfinished edge of the burlap on the outside edge of your wreath.
Step 3:
Burlap has a pretty loose weave, so I added a bead of hot glue where I threaded my needle through the fabric at first to hold it in place.
 |
| Let this be known that I haven't given myself a manicure in like two weeks. Which is a record for me. |
Run a straight stitch down the length of your burlap, then gather your fabric into a snazzy ruffle. Remember, I wanted this ruffle to be a little more "wavy" than "ruffley", so I didn't gather too much. Once I decided I liked how my burlap was gathered, I added another bead of hot glue to the end of my thread to hold it in place and maintain the wavy ruffle.
Step 4:
Decide which part of your wreath form you want to be the front and back, and then flip it over so it's front-side-down. Glue your ruffle to the back of your wreath.
 |
| Here the wreath is face up. Post-gluing down my ruffle. |
Step 4(a):
Apparently I am miserable at measuring. Shrug your shoulders because you know you'll come up with something in the meantime that'll keep your wreath from looking like it should be a burlap turkey (is it just me, or does anyone see the makings of a sweet turkey wreath?). It's not Thanksgiving yet, friends.
Step 5:
Repeat Step Four with your second strip of burlap that will be rufflier than your first. Gather that fabric and secure your thread.
Step 6:
Tuck your ruffley ruffle between your wreath form and your first ruffle and secure to both the wreath form and the first ruffle with your hot glue gun.

Note: Technically, I suppose you could glue your first smaller ruffley ruffle to the wreath form followed by your wider, less ruffley ruffle and not have to worry about tucking it in anywhere. The things you learn as you go.
Step 6(a):
Crap. This ruffle is too short, too. Brainstorm about a clever fix while you work.
Step 7:
Add the embellishments of your choice.
Even though you originally thought one glittered leaf would be enough embellishment for your simple fall wreath, decide that two more would be even more glitterific and fabulous and will cover up your inadequacies in measuring at the bottom of your wreath. Now it will not be looking like a burlap turkey.
Glue those suckers on. Hello, glam!
Decide that you just don't know when to quit and make a bow out of your burlap scraps. Glue it onto the top of your wreath.

Step Nine:
Hang your wreath on your sassy red door (or, you know, whatever color your front door is) and admire your hard work.

And there you have it! A rustic AND glittery glam Fall wreath that did not, in fact, wind up looking like a turkey. Thanks for bearing with me through the tutorial! I have a second more whimsical and fun wreath underway that is SO MUCH easier. Can't wait to share that one with you soon!
Who else out there is a wreath-making-maniac? I know I can't be the only one!
Linking up with:
The Turquoise Home, Ella Claire, The Brambleberry Cottage, 52 Mantels, The Shabby Creek Cottage, Embracing Change, Live Laugh Rowe, The Girl Creative, Glued to My Crafts, Imparting Grace, French Country Cottage, Blissful and Domestic, Jennifer Rizzo, My Romantic Home, Finding Fabulous, The Shabby Nest, House of Rose, Obsessive and Creative, Whipperberry, The Happy Housie, DIY Show Off, Craft-O-Maniac, Dimples and Pig Tales, Home Coming, Cupcakes & Crinoline, The Winthrop Chronicles, Not Just a Housewife, The Farmhouse Porch, A Stroll Thru Life, Home Stories A to Z, My Uncommon Slice of Suburbia, Cozy Little House, The Well Crafted Home, Savvy Southern Style, Ella Claire, DIY By Design, The DIY Dreamer, SNAP!, The Blissful Bee
Also linking up with:
Autumn Abounds Link Party
Love it! Looks so easy, definitely will try this one. I'm trying to use more burlap in my Autumn decor this year. TFS! Found you thru the Turqoise Home Linky Party.
ReplyDeletewww.vintagecreationsbycw.blogspot.com
Thank you, Carmen! I am LOVING burlap for all things Fall. It's such a cheap and interesting way to incorporate some natural elements into seasonal decor! Thank you for stopping by!
DeleteVery nice! I aspire to be a wreath making maniac, but I'm definitely not there yet. I don't think I've EVER made a wreath, in fact, but I was just thinking the other day that this fall might be my season. Thanks for the tutorial!
ReplyDeleteThanks, Gretchen. I have to admit wreath-making was a completely foreign concept to me two years ago, but making your own door decor is pretty fun and it's an easy way to kill a couple hours in front of the TV. :)
DeleteIt turned out so beautiful, Brittany! I absolutely love it!!!
ReplyDeleteXo Kylie
Thanks, Kylie! Glad you stopped in!
DeleteCute!!! I love the glittery leaves and the ruffles!
ReplyDeleteNavy Wifey Peters @ Submarine Sunday
Thank you!
DeleteWhat a cute fall wreath! Love the burlap ruffles and the bow! Very cute! :)
ReplyDeleteThanks, Maria!
DeleteThanks, Rhonda!!
ReplyDeleteWhat a pretty wreath, I love the burlap and the leaves are a great accent!
ReplyDeleteI linked over from the Work It Wednesday Link Party where I am participating too with Sympathy Card and Free Sympathy Cut File and Remember 911 card and would love it if you'd stop by.
Hugs, Antonella :-)
Thanks, Antonella! I will totally check out your blog!
DeleteThis is so lovely! I love the rustic look of burlap <3
ReplyDeleteOh be still my heart - this is gorgeous! I am going to Pin this, then make a shopping list for this weekend. I am so excited to have found this wreath and thank you for the tutorial!!! :)
ReplyDeleteThanks for your kind words, Elizabeth! Have fun making your wreath! :)
DeleteThis is super cute!! I didn't have any ideas yet this year for wreathage on the front door, but I might have to try this one! I like that you can use it all through fall. And of course, the glitter! :-) BTW your instructions were hilarious, I was laughing and felt like I was there lol Pinning this one now!
ReplyDeleteThanks, Ashley! I like your term "wreathage." :) Glitter makes everything better, in my opinion, and I'm glad you liked the tutorial!
DeleteVery pretty...I love how girly it is! I just made some embroidery hoop wreaths with friends at my craft party and now I keep finding new ones I want to try!
ReplyDeleteThanks, Deonna! Embroidery hoop wreaths sound fun. I'll have to give that a try next!
DeleteBeautiful job! Thanks for linking up to The DIY'ers!
ReplyDeleteThanks, Kayla!
DeleteWhat a pretty wreath. I need to pin this one.
ReplyDeleteThanks, Jen! :)
DeleteSuch a pretty wreath and love the tutorial too. Thanks tons for linking to Inspire Me. Hugs, Marty
ReplyDeleteGreat wreath! I've been wanted to try a burlap one...you make it look pretty easy!
ReplyDeleteSam
CooksAndCreates.blogspot.com
{found you on Someday Crafts}
Thanks, Sam! Burlap is super easy to work with, especially with this wreath. You should totally give it a shot!
DeleteYou are hilarious! This did turn out pretty darn cute in the end! Thanks so much for sharing at our Get Your DIY on Party! Next week's theme is Thrifty Upcycles, I hope you can share with/ entertain us again! It all starts Sunday at 7:00 est! :)
ReplyDeleteThanks Christy! I am loving your link-up!
DeleteThis is just darling!
ReplyDeleteThank you, Carol!
DeleteWoohooo! Thanks Camila! Glad you stopped by! :)
ReplyDelete